Lightning Deals End in
dayshoursminssecsSale USD $299.00 USD $629.00
Feiyu SCORP Pro 3-Axis Camera Handheld Stabilizer
334.6*195.8*274mm (balancing position)
353.1*75.3*234.9mm (folded position)
About 2.1kg/4.63lbs (including quick release plate, not included other accessories and camera)
About 4.8kg/10.58lbs (well balanced)
Synthetic macromolecular resin,Alumninum Alloys
Splash-proof
3-axis Motor
1.3'' OLED Touchscreen
Tilt:+110°~-45°
Roll:+20°~-20°
Pan:360°(Unlimited)
Tilt: 340°(With limitation)
Roll: 340°(With limitation)
Pan: 360°(Unlimited)
Lithium Cell
2500mAh, built-in battery cannot be removed, charge it via the USB-C port
12 hours
13V-16.8V
-10°- 45°C
About 2.75 hours (Using 18W fast charger)
Feiyu SCORP
iOS 9.0 or later
Android 6.0 or later
Pan follow, only the pan axis follows the hand movement
Pan and tilt follow, only the pan and tilt axes follow the hand movement
Pan, tilt and roll follow, all three axes follow the hand movement
All three axes do not follow the hand movement, the gimbal keeps the fixed direction of the camera
Flash follow, all three axes follow the hand movement at high speed
3/8 inch thread hole*1, with the 3/8- 1/4 inch thread insert (Standard accessory), user can also mount Tripod which using 1/4 inch screw;
ARCA quick release base plate *1, can fast mount gimbal on popular quick release systems without re-assembling camera;
Type-C charging port*1, charge for gimbal and remote control handle;
ARRI rosettes*2;
quick release mount for remote control handle *1, for installation of remote control handle;
Type-C extension port*2 to connect focus motors;
Type-C camera control port*1, Type-C image transmission port*1;
1/4 inch thread hole*1, for installation of lens holder;
Type-C charging port*1, handle charging only;
While connecting the gimbal and your camera with cable (standard accessories for SONY, CANON, NIKON, Panasonic), users can control picture-taking/recording with shutter button and set aperture, shutter, ISO and other camera parameters (see Camera Compatibility List for more).
Auto Tune operation:
Enter the motor power setting through the touchscreen or Feiyu SCORP App, select Auto Tune, and then place the gimbal on the table until the display prompts that calibration is complete. The gimbal will automatically adjust the motor power based on the camera and lens you have installed.
*It's a normal phenomenon that gimbal will vibrate slightly while Auto Tune to weigh the camera. When using a new camera and lens combination, it is recommended to Auto Tune the motor power after installing the camera and turning on the gimbal.
SCORP Pro main body*1, Remote control handle*1, Tripod*1
Data cable USB 2.0 to Type-C*1, Shutter cable Type-C to Micro(A03)*1, Shutter cable Type-C to Mini (B02)*1, Shutter cable Type-C to Type-C (C02)*1, Shutter cable Type-C to TRS2.5 (T02)*1, Sony shutter cable Type-C to Multi*1, Panasonic shutter cable (DC2.5mm) Type-C to 2.5mm*1
Quick release plate*1, Camera backing base*1, Lens holder*1, Lens holder screw*1, Camera fixed screw*3, 3/8- 1/4 inch thread insert (the thread insert is factory mounted on tripod)*1
Only support cable control. Controllable camera focus, take pictures, and record video. For the details please refer to the camera compatibility list.
(1) The battery for Feiyu SCORP Pro is build-in.
(2) Support 18W fast charger(9V/2A). It will take around 3 hours to fully charge the batteries with a 9V/2A output charger. The indicator is red when charging, and it turns to green when fully charged.
(3) The stabilizer will charging the remote control while install properly.
About 12 hours(Center of gravity of stabilizer is balanced).
The quick release plate measures 133x50x11 mm and the camera backing base measures 50x38x14 mm.
(1) Please check whether the stabilizer is in sleep mode, and make sure all the motor locks are unlocked. Next, wake up the stabilizer by single tap the power button or click the moon icon on the touch screen.
(2) Please make sure the remote control handle is installed properly. Please remove the remote control and reinstall again, then turn the stabilizer on by long press the power button about 5 seconds.
(3) Please make sure the battery were fully charged.
(1) Please make sure all those three axes were balanced properly with camera, and all the motor locks are unlocked, as well as all the screws are tighten properly.
(2) Motor power does not match the weight of camera, please try to set up the motor strength to Auto tune or manually adjust the motor strength on the touch screen.
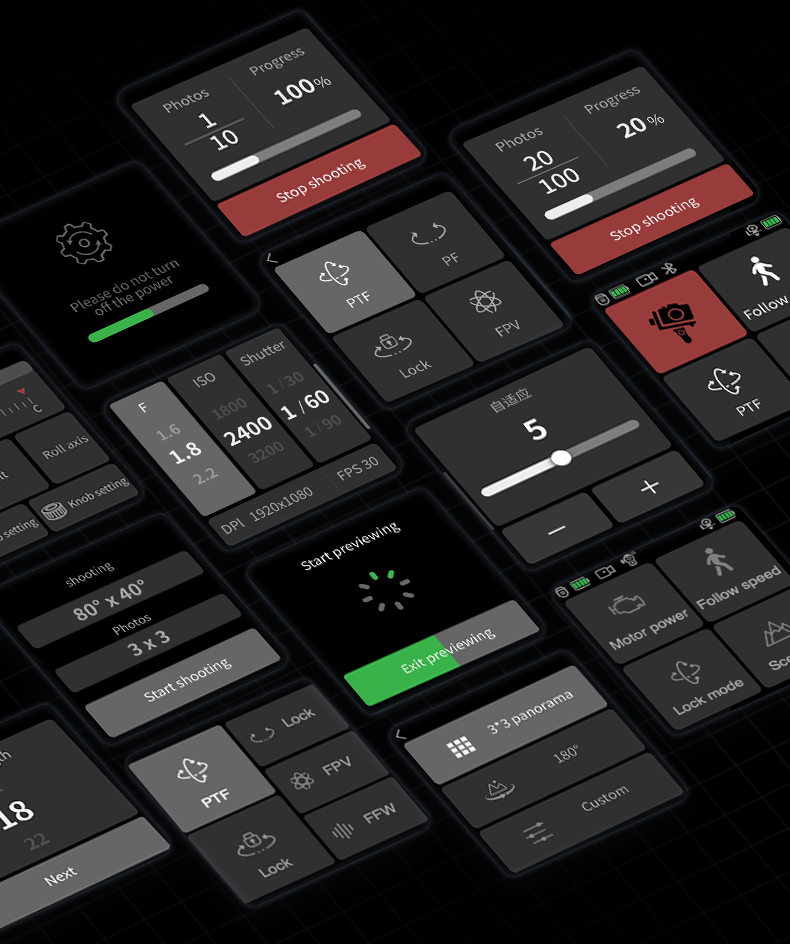
When the stabilizer drifts due to changes in the environment or some misoperations, please make sure the working mode is not work with FPV mode, then slide left on the main page, and select stabilizer settings/horizontal calibration/auto calibration. (The drift of the gyroscope will cause stabilizer work abnormal.)
Please make sure the working mode is not work with FPV mode, then slide left on the main page, and select stabilizer settings/horizontal calibration/auto calibration.
(1) Control the pan, tilt and roll axis(under the axis-control state)
(2) Control zooming in/out electronically
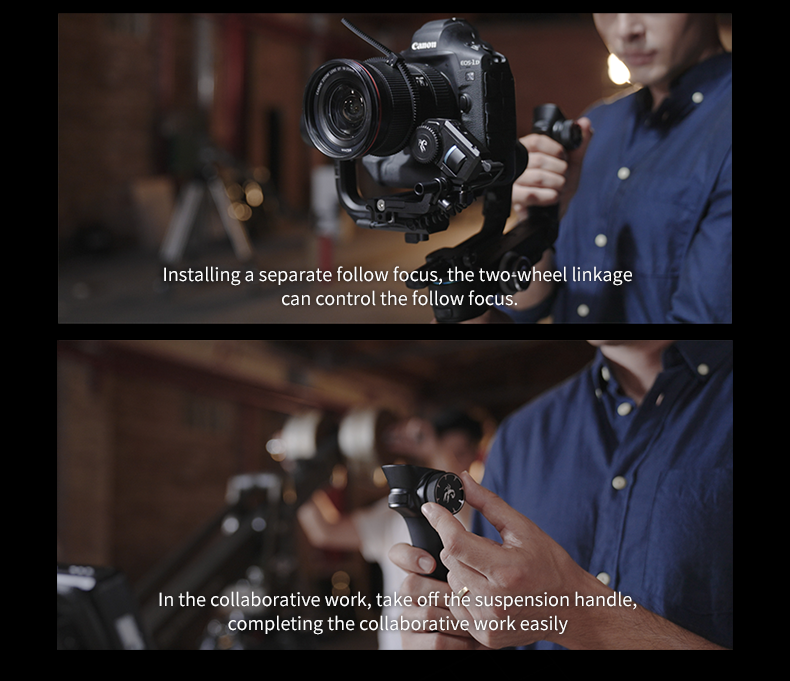
(3) Control Focus motor
(4) Adjust stabilizer/camera parameters (Aperture, shutter speed, ISO, motor strengths, follow speed, dead zone, joystick speed, horizontal calibration, etc.)
Please make sure that the stabilizer and camera are connected properly (the camera&lens needs to support electronic zoom). Swipe on the main page, press and hold the knob function switch button to change control to electronic zoom. Turn the knob to zoom in/out.
(1) Attach Follow Focus to the rod, and make sure the follow focus gear is attached to teeth on the gear ring belt fixed on your camera lens. After installing them with stabilizer properly, then turn the stabilizer on, press and hold the knob function switch button to change control to Follow Focus control.
(2) Calibrating the Follow Focus: Swipe on the main page, rotate the lens’focus ring to the farthest focus point,next, rotate to the nearest focus point. (Notes: After remove the cable while using, when plugging with cable again, we will need to re-calibrate the Follow Focus.)
(1) Controlling the axises: Long press A,B or C button to record the current position of the axis, single tap A,B or C button, stabilizer will automatically turn to the point that were been recorded on previously.
(2) Controlling Follow Focus: Long press A,B or C button to record the focus range on the lens, single tap A,B or C button, the lens will automatically turn to the focus range that were been recorded on previously.
(3) Controlling zoom in/out: Long press A or B button to record the points, single tap A or B button to zoom in/out between points A and B.( Since unable to obtain the camera range, the point A and B will be inaccurate.)
Time-lapse, Auto rotation, Panoramic, Portrait, Selfie, Track video
(1) The farthest controllable distance between the remote control and Feiyu SCORP Pro is about 20 meters.
(2) The farthest controllable distance between Feiyu SCORP App and Feiyu SCORP Pro is about 30 meters(This will be affected by the bluetooth signal of the smartphone).
Feiyu SCORP Pro will enter sleep mode if user didn't balance it or unlock axis locks. Please make sure the camera were balanced properly, as well as all the motor locks were unlocked. Please single tap the power button to wake up the stabilizer, next, adjust the motor strength to match the weight for the camera. (Notes: Double tap the power button to enter into sleep mode, wake up the stabilizer by click the moon icon on the touch screen.)
IOS version: Go to the App Store to search for Feiyu SCORP to download.
Android version: Go to Google play to search for Feiyu SCORP to download.
After connecting bluetooth between stabilizer and Feiyu SCORP successfully, the App do have following functions: upgrade the firmware, parameters settings and control the stabilizer by the virtual joystick, etc.
(1) Please make sure the network is in good condition.
(2) Before turn the stabilizer on, please make sure the remote control were installed with the stabilizer properly.
(3) Please enter into the remote control interface, next, click the settings icon, select Firmware update.
(Note: Please do not press any buttons during the upgrade process; please keep the phone screen always on during the upgrade process; the firmware upgrade will take a long time, please wait patiently for about 13 minutes.)