30-Day Returns | Available Overseas Stock
Sale USD $479.00 USD $629.00
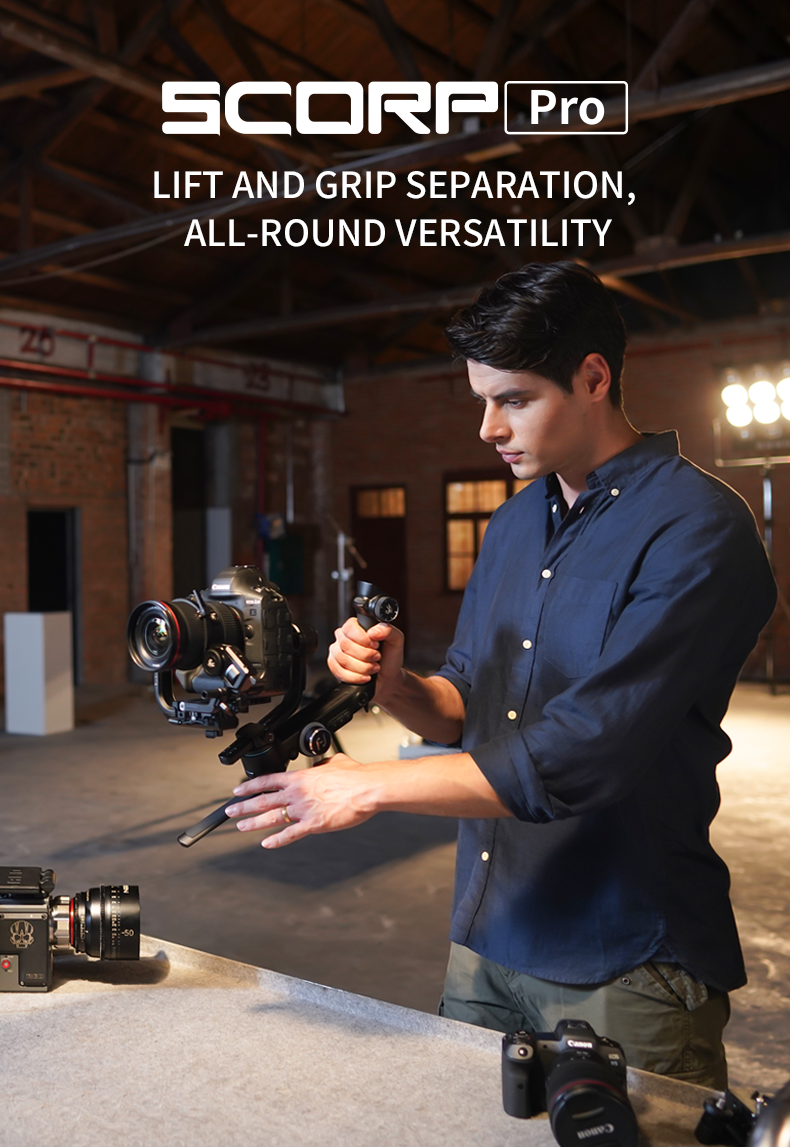
Feiyu SCORP Pro 3-Axis Camera Handheld Stabilizer
334.6*195.8*274mm (balancing position)
353.1*75.3*234.9mm (folded position)
About 2.1kg/4.63lbs (including quick release plate, not included other accessories and camera)
About 4.8kg/10.58lbs (well balanced)
Synthetic macromolecular resin,Alumninum Alloys
Splash-proof
3-axis Motor
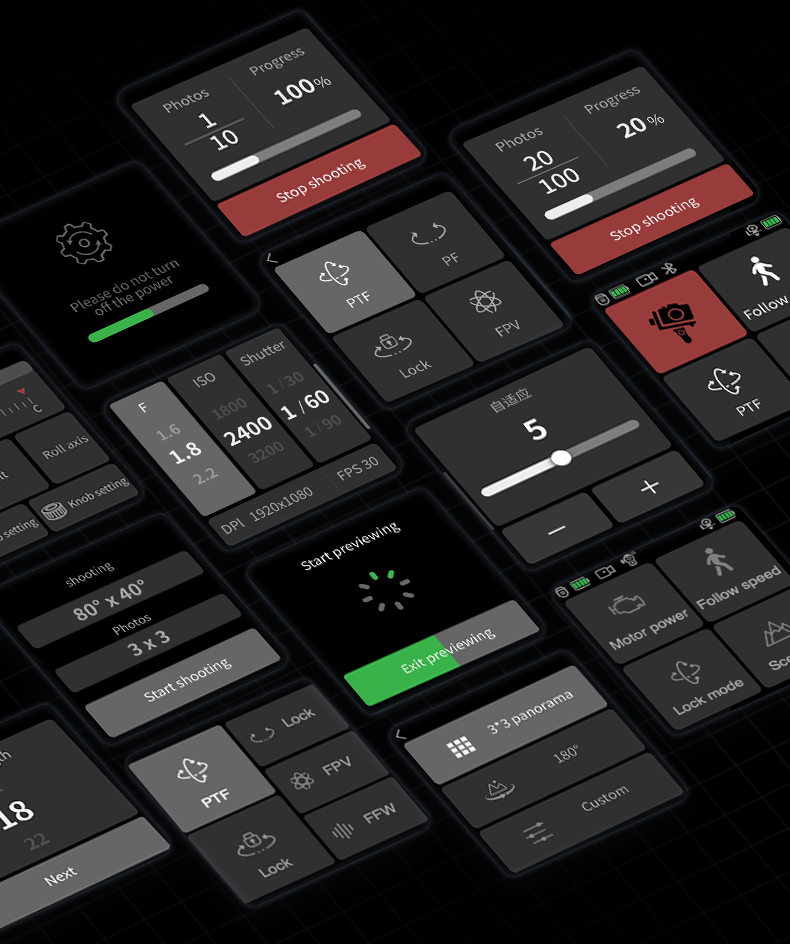
1.3'' OLED Touchscreen
Tilt:+110°~-45°
Roll:+20°~-20°
Pan:360°(Unlimited)
Tilt: 340°(With limitation)
Roll: 340°(With limitation)
Pan: 360°(Unlimited)
Lithium Cell
2500mAh, built-in battery cannot be removed, charge it via the USB-C port
12 hours
13V-16.8V
-10°- 45°C
About 2.75 hours (Using 18W fast charger)
Feiyu SCORP
iOS 9.0 or later
Android 6.0 or later
Pan follow, only the pan axis follows the hand movement
Pan and tilt follow, only the pan and tilt axes follow the hand movement
Pan, tilt and roll follow, all three axes follow the hand movement
All three axes do not follow the hand movement, the gimbal keeps the fixed direction of the camera
Flash follow, all three axes follow the hand movement at high speed
3/8 inch thread hole*1, with the 3/8- 1/4 inch thread insert (Standard accessory), user can also mount Tripod which using 1/4 inch screw;
ARCA quick release base plate *1, can fast mount gimbal on popular quick release systems without re-assembling camera;
Type-C charging port*1, charge for gimbal and remote control handle;
ARRI rosettes*2;
quick release mount for remote control handle *1, for installation of remote control handle;
Type-C extension port*2 to connect focus motors;
Type-C camera control port*1, Type-C image transmission port*1;
1/4 inch thread hole*1, for installation of lens holder;
Type-C charging port*1, handle charging only;
While connecting the gimbal and your camera with cable (standard accessories for SONY, CANON, NIKON, Panasonic), users can control picture-taking/recording with shutter button and set aperture, shutter, ISO and other camera parameters (see Camera Compatibility List for more).
Auto Tune operation:
Enter the motor power setting through the touchscreen or Feiyu SCORP App, select Auto Tune, and then place the gimbal on the table until the display prompts that calibration is complete. The gimbal will automatically adjust the motor power based on the camera and lens you have installed.
*It's a normal phenomenon that gimbal will vibrate slightly while Auto Tune to weigh the camera. When using a new camera and lens combination, it is recommended to Auto Tune the motor power after installing the camera and turning on the gimbal.
SCORP Pro main body*1, Remote control handle*1, Tripod*1
Data cable USB 2.0 to Type-C*1, Shutter cable Type-C to Micro(A03)*1, Shutter cable Type-C to Mini (B02)*1, Shutter cable Type-C to Type-C (C02)*1, Shutter cable Type-C to TRS2.5 (T02)*1, Sony shutter cable Type-C to Multi*1, Panasonic shutter cable (DC2.5mm) Type-C to 2.5mm*1
Quick release plate*1, Camera backing base*1, Lens holder*1, Lens holder screw*1, Camera fixed screw*3, 3/8- 1/4 inch thread insert (the thread insert is factory mounted on tripod)*1
I discovered that a lot of the stabilizing feels like metal on metal. Some paint has already started to chip from light handling. Do not try to adjust the stabilizer with a heavy camera attached. Besides that. The stabilizer is GREAT.
Awesome gimbal which I am still setting up.
Would like to see some quick release attachments available like the folding handles but with out the handles..
A part that can be bolted to different things.
Also a module that has ExpressLRS in that connects to the Bluetooth on the gimbal for unlimited range control.. and that would be absolutely amazing for filmmakers.. running wireless systems..
I bought the SCORP Pro after researching gimbals sturdy enough to carry a Kinefinity Terra cinema camera. I’d seen some mixed reviews if other brands equipment but every review regarding the SCORP Pro was positive. And now I can see why.
1. Set up- is a breeze due to the locking axis and motor calibration
2. QUALITY!- I found aluminium in places I expected plastic. Where there is plastic it’s soft touch quality plastic. Tolerances are excellent. The feel of this gimbal has to be experienced.
3. Versatility- yup, it does everything you’d expect it to. Plus, it can do it remotely AT NO EXTRA COST, it’s built in.
The only negative, and it’s a small one really, the user manual is pretty light on detail so best get familiar with the (admittedly excellent) Feiyutech web site.
Oh, and the value for money is unbelievable.
I’d like Feiyutech to add Kinefinity to the list of supported camera brands but for now I can work around that. Not forever though Feiyutech!
Can’t wait to get on set with this baby.
I really like that’s the scorp pro it dose a lot of things I like It I like the flexibility to it
This gimbal looks really amazing ! Strong, powerfull, usefull, but I come from the AK4000 and I find the structure pointing to us quite unusefull.
This big stuff (battery place) is sometimes annoying to manipulate the gimbal close to the body, you miss 30 cm of background in motion.
works fine till yestserday - multifunction handle touchpaneel functions no more available no lighting - but buttons still working.
In today's video, we review the new Feiyutech Scorp Pro gimbal for DSLR, mirrorless and cinema cameras. With a huge max payload, unique design and a detachable, wireless controller arm, the Scorp Pro is full of impressive features making it a great choice for professional video for users with bigger and heavier camera setups, but it's not without its flaws.
케이블 제어만 지원합니다. 카메라 초점을 제어하고 사진을 찍고 비디오를 녹화할 수 있습니다. 자세한 내용은 카메라 호환성 목록을 참조하세요.
(1) Feiyu SCORP Pro용 배터리는 내장되어 있습니다.
(2) 18W 고속 충전기(9V/2A)를 지원합니다. 9V/2A 출력 충전기로 배터리를 완전히 충전하는 데 약 3시간이 소요됩니다. 충전 중에는 표시등이 빨간색이고, 완전히 충전되면 녹색으로 변합니다.
(3) 안정기는 제대로 설치되는 동안 리모콘을 충전합니다.
약 12시간(스태빌라이저의 무게중심이 균형을 이룬 상태)
퀵 릴리스 플레이트의 크기는 133x50x11mm이고 카메라 백킹 베이스의 크기는 50x38x14mm입니다.
(1) 스태빌라이저가 절전 모드에 있는지 확인하고 모든 모터 잠금 장치가 잠금 해제되어 있는지 확인하십시오. 그런 다음 전원 버튼을 한 번 탭하거나 터치 스크린의 달 아이콘을 클릭하여 안정 장치를 깨우세요.
(2) 리모컨 손잡이가 제대로 설치되어 있는지 확인하세요. 리모컨을 제거했다가 다시 설치한 후 전원 버튼을 5초 정도 길게 눌러 안정기를 켜주세요.
(3) 배터리가 완전히 충전되었는지 확인하십시오.
(1) 세 축이 모두 카메라와 제대로 균형을 이루고 있는지, 모든 모터 잠금 장치가 잠금 해제되어 있는지, 모든 나사가 제대로 조여져 있는지 확인하세요.
(2) 모터 출력이 카메라 무게와 일치하지 않습니다. 모터 강도를 자동 조정으로 설정하거나 터치 스크린에서 모터 강도를 수동으로 조정해 보십시오.
환경 변화 또는 일부 오작동으로 인해 안정 장치가 표류하는 경우 작업 모드가 FPV 모드와 작동하지 않는지 확인한 다음 메인 페이지에서 왼쪽으로 슬라이드하고 안정 장치 설정/수평 교정/자동 교정을 선택하십시오. (자이로스코프의 드리프트로 인해 안정 장치가 비정상적으로 작동합니다.)
작업 모드가 FPV 모드와 작동하지 않는지 확인한 다음 메인 페이지에서 왼쪽으로 슬라이드하고 안정 장치 설정/수평 보정/자동 보정을 선택하십시오.
(1) 팬, 틸트, 롤 축 제어(축 제어 상태에서)
(2) 전자적으로 확대/축소 제어
(3) 제어 초점 모터
(4) 안정 장치/카메라 매개변수 조정(조리개, 셔터 속도, ISO, 모터 강도, 팔로우 속도, 데드존, 조이스틱 속도, 수평 보정 등)
안정 장치와 카메라가 올바르게 연결되어 있는지 확인하십시오(카메라와 렌즈는 전자 줌을 지원해야 함). 메인 페이지를 스와이프하고 손잡이 기능 전환 버튼을 길게 눌러 제어를 전자 줌으로 변경하세요. 손잡이를 돌려 확대/축소합니다.
(1) 팔로우 포커스를 로드에 부착하고 카메라 렌즈에 고정된 기어 링 벨트의 톱니에 팔로우 포커스 기어가 부착되어 있는지 확인하세요. 스태빌라이저와 함께 올바르게 설치한 후 스태빌라이저를 켜고 노브 기능 스위치 버튼을 길게 눌러 제어를 팔로우 포커스 제어로 변경합니다.
(2) 팔로우 포커스 보정: 메인 페이지를 스와이프하고 렌즈의 초점 링을 가장 먼 초점 포인트로 돌린 다음 가장 가까운 초점 포인트로 회전합니다. (참고: 사용 중에 케이블을 제거한 후 케이블을 다시 연결할 때 팔로우 포커스를 다시 보정해야 합니다.)
(1) 축 제어: A, B 또는 C 버튼을 길게 눌러 축의 현재 위치를 기록하고, A, B 또는 C 버튼을 한 번 탭하면 안정 장치가 이전에 기록된 지점으로 자동으로 회전합니다.
(2) 팔로우 포커스 제어: A, B 또는 C 버튼을 길게 눌러 렌즈의 초점 범위를 기록하고, A, B 또는 C 버튼을 한 번 탭하면 렌즈가 이전에 기록된 초점 범위로 자동으로 전환됩니다.
(3) 확대/축소 제어: A 또는 B 버튼을 길게 눌러 지점을 기록하고, A 또는 B 버튼을 한 번 탭하여 A 지점과 B 지점 사이를 확대/축소합니다.(카메라 범위를 얻을 수 없으므로 A 지점과 B 지점은 B는 정확하지 않습니다.)
타임랩스, 자동 회전, 파노라마, 인물 사진, 셀카, 비디오 트랙
(1) 리모콘과 Feiyu SCORP Pro 사이의 가장 먼 제어 가능 거리는 약 20미터 입니다.
(2) Feiyu SCORP 앱과 Feiyu SCORP Pro 사이의 제어 가능한 가장 먼 거리는 약 30미터 입니다(이는 스마트폰의 블루투스 신호에 영향을 받습니다).
Feiyu SCORP Pro는 사용자가 균형을 맞추지 않거나 축 잠금을 해제하지 않은 경우 절전 모드로 전환됩니다. 카메라의 균형이 제대로 잡혀 있는지, 모든 모터 잠금 장치가 잠금 해제되었는지 확인하세요. 전원 버튼을 한 번 탭하여 스태빌라이저를 활성화한 다음 카메라 무게에 맞게 모터 강도를 조정하세요. (참고: 절전 모드로 들어가려면 전원 버튼을 두 번 탭하고, 터치 스크린의 달 아이콘을 클릭하여 안정 장치를 깨우세요.)
IOS 버전: App Store로 이동하여 Feiyu SCORP를 검색하여 다운로드하세요.
Android 버전: Google Play로 이동하여 Feiyu SCORP를 검색하여 다운로드하세요.
스태빌라이저와 Feiyu SCORP 사이에 블루투스를 성공적으로 연결한 후 앱에는 펌웨어 업그레이드, 매개변수 설정, 가상 조이스틱으로 스태빌라이저 제어 등의 기능이 있습니다.
(1) 네트워크 상태가 양호한지 확인하십시오.
(2) 안정 장치를 켜기 전에 리모콘이 안정 장치와 함께 올바르게 설치되었는지 확인하십시오.
(3) 원격 제어 인터페이스로 들어가서 설정 아이콘을 클릭하고 펌웨어 업데이트를 선택하십시오.
(참고: 업그레이드 프로세스 중에는 아무 버튼도 누르지 마십시오. 업그레이드 프로세스 중에는 휴대폰 화면을 항상 켜 두십시오. 펌웨어 업그레이드에는 시간이 오래 걸리므로 약 13분 정도 기다려 주십시오.)
캐논 Rebel T6과 작동할 수 있나요?
짐벌에 장착하고 안정화할 수 있지만, 짐벌은 카메라 기능이나 매개변수를 제어할 수 없습니다.
안녕하세요. 스콜프 프로 짐벌을 사용하는 방법에 대한 매뉴얼이 있나요? 무료로 다운로드할 수 있는 것이요? 또한 이 새로운 짐벌의 기능을 소개하고 설명하는 비디오(상업용 비디오 외)가 있나요? 시간 내주셔서 감사합니다...
안녕하세요. 제품 매뉴얼이나 튜토리얼은 제품 페이지의 '다운로드' 섹션을 확인해주세요. 감사합니다.
SCORP Pro 짐벌을 위한 팔로우 포커스 모터는 패키지에 포함되어 있지 않으며 별도로 구매해야 합니다. SCORP 팔로우 포커스 모터는 AK 시리즈 AKFII와 다릅니다. 자세한 내용은 다음 페이지를 참조해 주세요: https://store.feiyu-tech.com/products/follow-focus-for-scorp
Hello. Can I use two focus motors on the scorp pro?
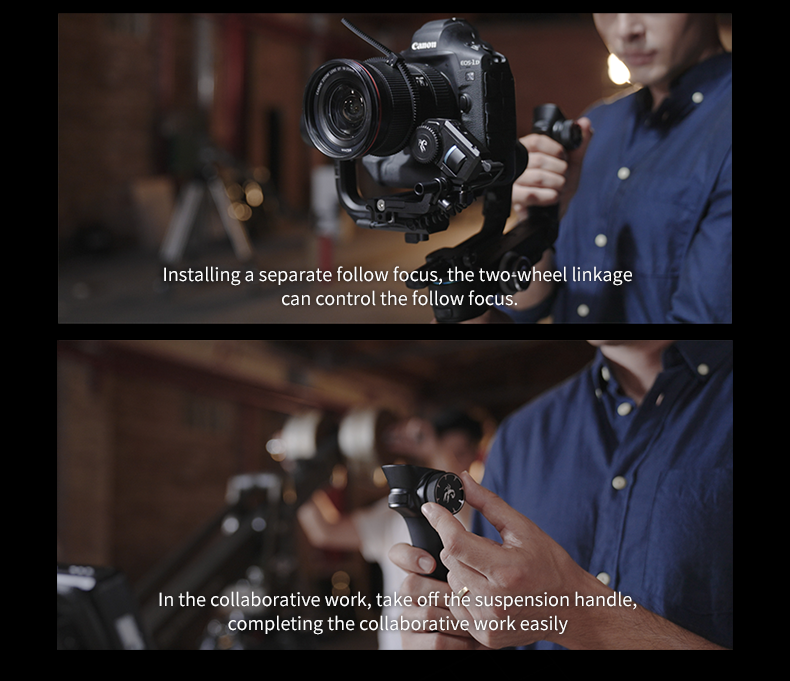
Yes, SCORP Pro supports two follow focus motors. You can use one for focus control and another for zoom control, and use two multifunction knobs to control each.
does It works with canon 6d mark ii ?
Yes, SCORP Pro works with Canon 6d mark ii camera via Type-C to Mini cable(included in the package). Controllable camera functions are Take Photo, Start/Stop Recording Video, Playback, Pull Focus, Shutter Speed, Aperture, ISO.
For more gimbals compatible with 6D mark ii, please check this page: Camera Function Query
Hi, When the remote is detached, for example when using it with the carbon frame, can any of the knobs/ buttons be used to re-centre on the remote?
When the remote is detached, you can choose to re-center the gimbal via the touch screen of the remote. In addition, you can also use the Feiyu SCORP app to re-center the gimbal or double click the Trigger button on the gimbal body.
Where can I find a tutorial video on this gimbal?
For more tutorial videos about the Scorp Pro gimbal, please view: Scorp Pro Tutorials
i have a FX6 is it compatible?
Sorry to tell you that Scorp Pro is not compatible with the FX6 camera.
예, Scorp Pro 다용도 크로스 암의 왼쪽과 오른쪽에 ARRI 로제트가 있어 외부 모니터를 설치할 수 있습니다.
소니 A7Siii를 사용하여 줌 기능을 설정하고 사용하는 방법은 무엇인가요?
먼저, 카메라보다 짐벌을 먼저 켜기 전에 Type-C to Multi 케이블을 사용하는지 확인하십시오. 그런 다음 [줌 설정]을 "Clear Image Zoom" 또는 "Digital Zoom"으로 설정하여 디지털 줌을 활성화하십시오.